

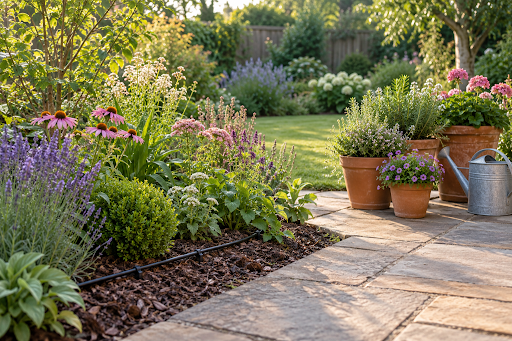
A patio pot, a newly planted hedge and an established flower border can respond very differently to the same weather. Giving everything a quick watering each evening may leave some roots short of moisture while other areas receive more than they need. A useful watering routine starts with recognising those differences.
If you are planning an automatic system, a discussion with an irrigation specialist like TCR Watering should begin with what grows where. Mapping containers, new planting and established beds gives the design a practical starting point. It also helps identify which areas need separate control, so the whole garden does not receive the same treatment simply because it shares a water supply.
Start With a Simple Garden Map
You do not need a detailed landscape drawing to understand your garden’s watering needs. A rough sketch showing beds, containers, trees and water sources is enough to begin. Add notes about which areas receive afternoon sun, which are exposed to wind and where you regularly find dry soil.
Mark new planting separately from established plants. The RHS advises watering newly planted trees and shrubs during dry spells while they establish, whereas established border plants generally need much less intervention. Plants beneath tree canopies or close to walls may also remain dry after rain because these features shelter the ground.
Use the map to record observations rather than assumptions. A shaded corner is not necessarily moist, and a shower does not mean every plant has received useful water. Checking a few representative spots will give you a clearer picture than judging the garden from the patio.
Give Containers Their Own Routine
Plants in pots have a limited volume of compost to draw moisture from, so they need different attention from plants growing in the ground. Container size, exposure and the plant itself all affect how quickly that moisture is used.
Check below the compost surface before watering. Light rain may wet the top without reaching much further, especially where foliage covers the pot. The RHS recommends watering containers slowly and thoroughly, directing water onto the compost and stopping when water begins to appear at the drainage holes.
When arranging pots, group plants with similar watering needs where practical. This makes checking them easier and helps avoid giving a moisture-loving plant and a drought-tolerant one identical treatment. If pots are connected to irrigation, review the arrangement whenever you move, replace or repot a plant.
Match the Watering Method to the Planting
For a small collection of pots, a watering can offers useful control over where water goes and how much is applied. A larger newly planted border may justify drip irrigation, which delivers water slowly through emitters positioned around the planting.
The important question is whether moisture reaches the roots that need it. A pipe running through a bed does not automatically provide suitable coverage for every plant. Check the ground after a watering cycle, including plants at the edges and any that sit away from the main pipe route.
Dripper output also helps make a schedule understandable. For example, an emitter rated at two litres per hour would nominally deliver half a litre during a 15-minute run, provided it operates under its specified conditions. That is a measure of delivery, not a recommendation for how much any particular plant needs. The RHS describes drip systems as providing calibrated outputs that can be matched to the planting.
Reduce Water Loss Before Increasing Supply
When one area repeatedly dries out, consider whether changes to planting or soil management could reduce its demand. Waterwise recommends choosing plants suited to the conditions, grouping those with similar requirements and using mulch to help retain soil moisture.
This is particularly useful when redesigning a border. Keeping a thirsty plant in an exposed position can create an ongoing watering commitment. Choosing a suitable replacement may make more sense than expanding irrigation around it.
Rainwater storage can also become part of the routine. Position a water butt where it can collect from a suitable downpipe and where filling a watering can will be convenient. Think about access as well as capacity: stored water is more likely to be used when reaching it does not involve carrying heavy cans across the entire garden.
Adjust Automatic Watering as Conditions Change
A timer can make watering more manageable, but its settings still need attention. A programme established during a warm, dry spell may be excessive after cooler weather arrives. Rain sensors can help avoid unnecessary cycles, although checking the soil remains useful when deciding whether the settings suit the planting.
Make occasional checks while the system is running. Look for disconnected fittings, damaged pipework and emitters that have moved away from their intended position. Compare areas that look healthy with those that appear stressed before increasing the running time for an entire zone.
Keep a brief record of adjustments. Noting the date, weather and reason for a change makes it easier to understand what worked. Before going away, run the system through its normal programme and confirm that every intended area receives water.
Review the Garden Through the Seasons
As plants establish, their watering requirements change, so revisit the plan rather than keeping the original settings indefinitely. The RHS’s guide to watering plants wisely explains how needs differ between containers, young trees, borders and other planting, making it a useful reference when reviewing your routine.
Choose a few places to check regularly, such as a sunny container, a new shrub and an established border. Those observations can guide small, targeted adjustments throughout the year. Over time, you will build a routine that reflects how your garden actually behaves, with water directed to the plants that need it.
